Hi everyone! You haven’t read anything from me yet… I am Chris, the skipper of SV Avocet and (by my wife’s request) will be blogging about the mechanical side of boat ownership.
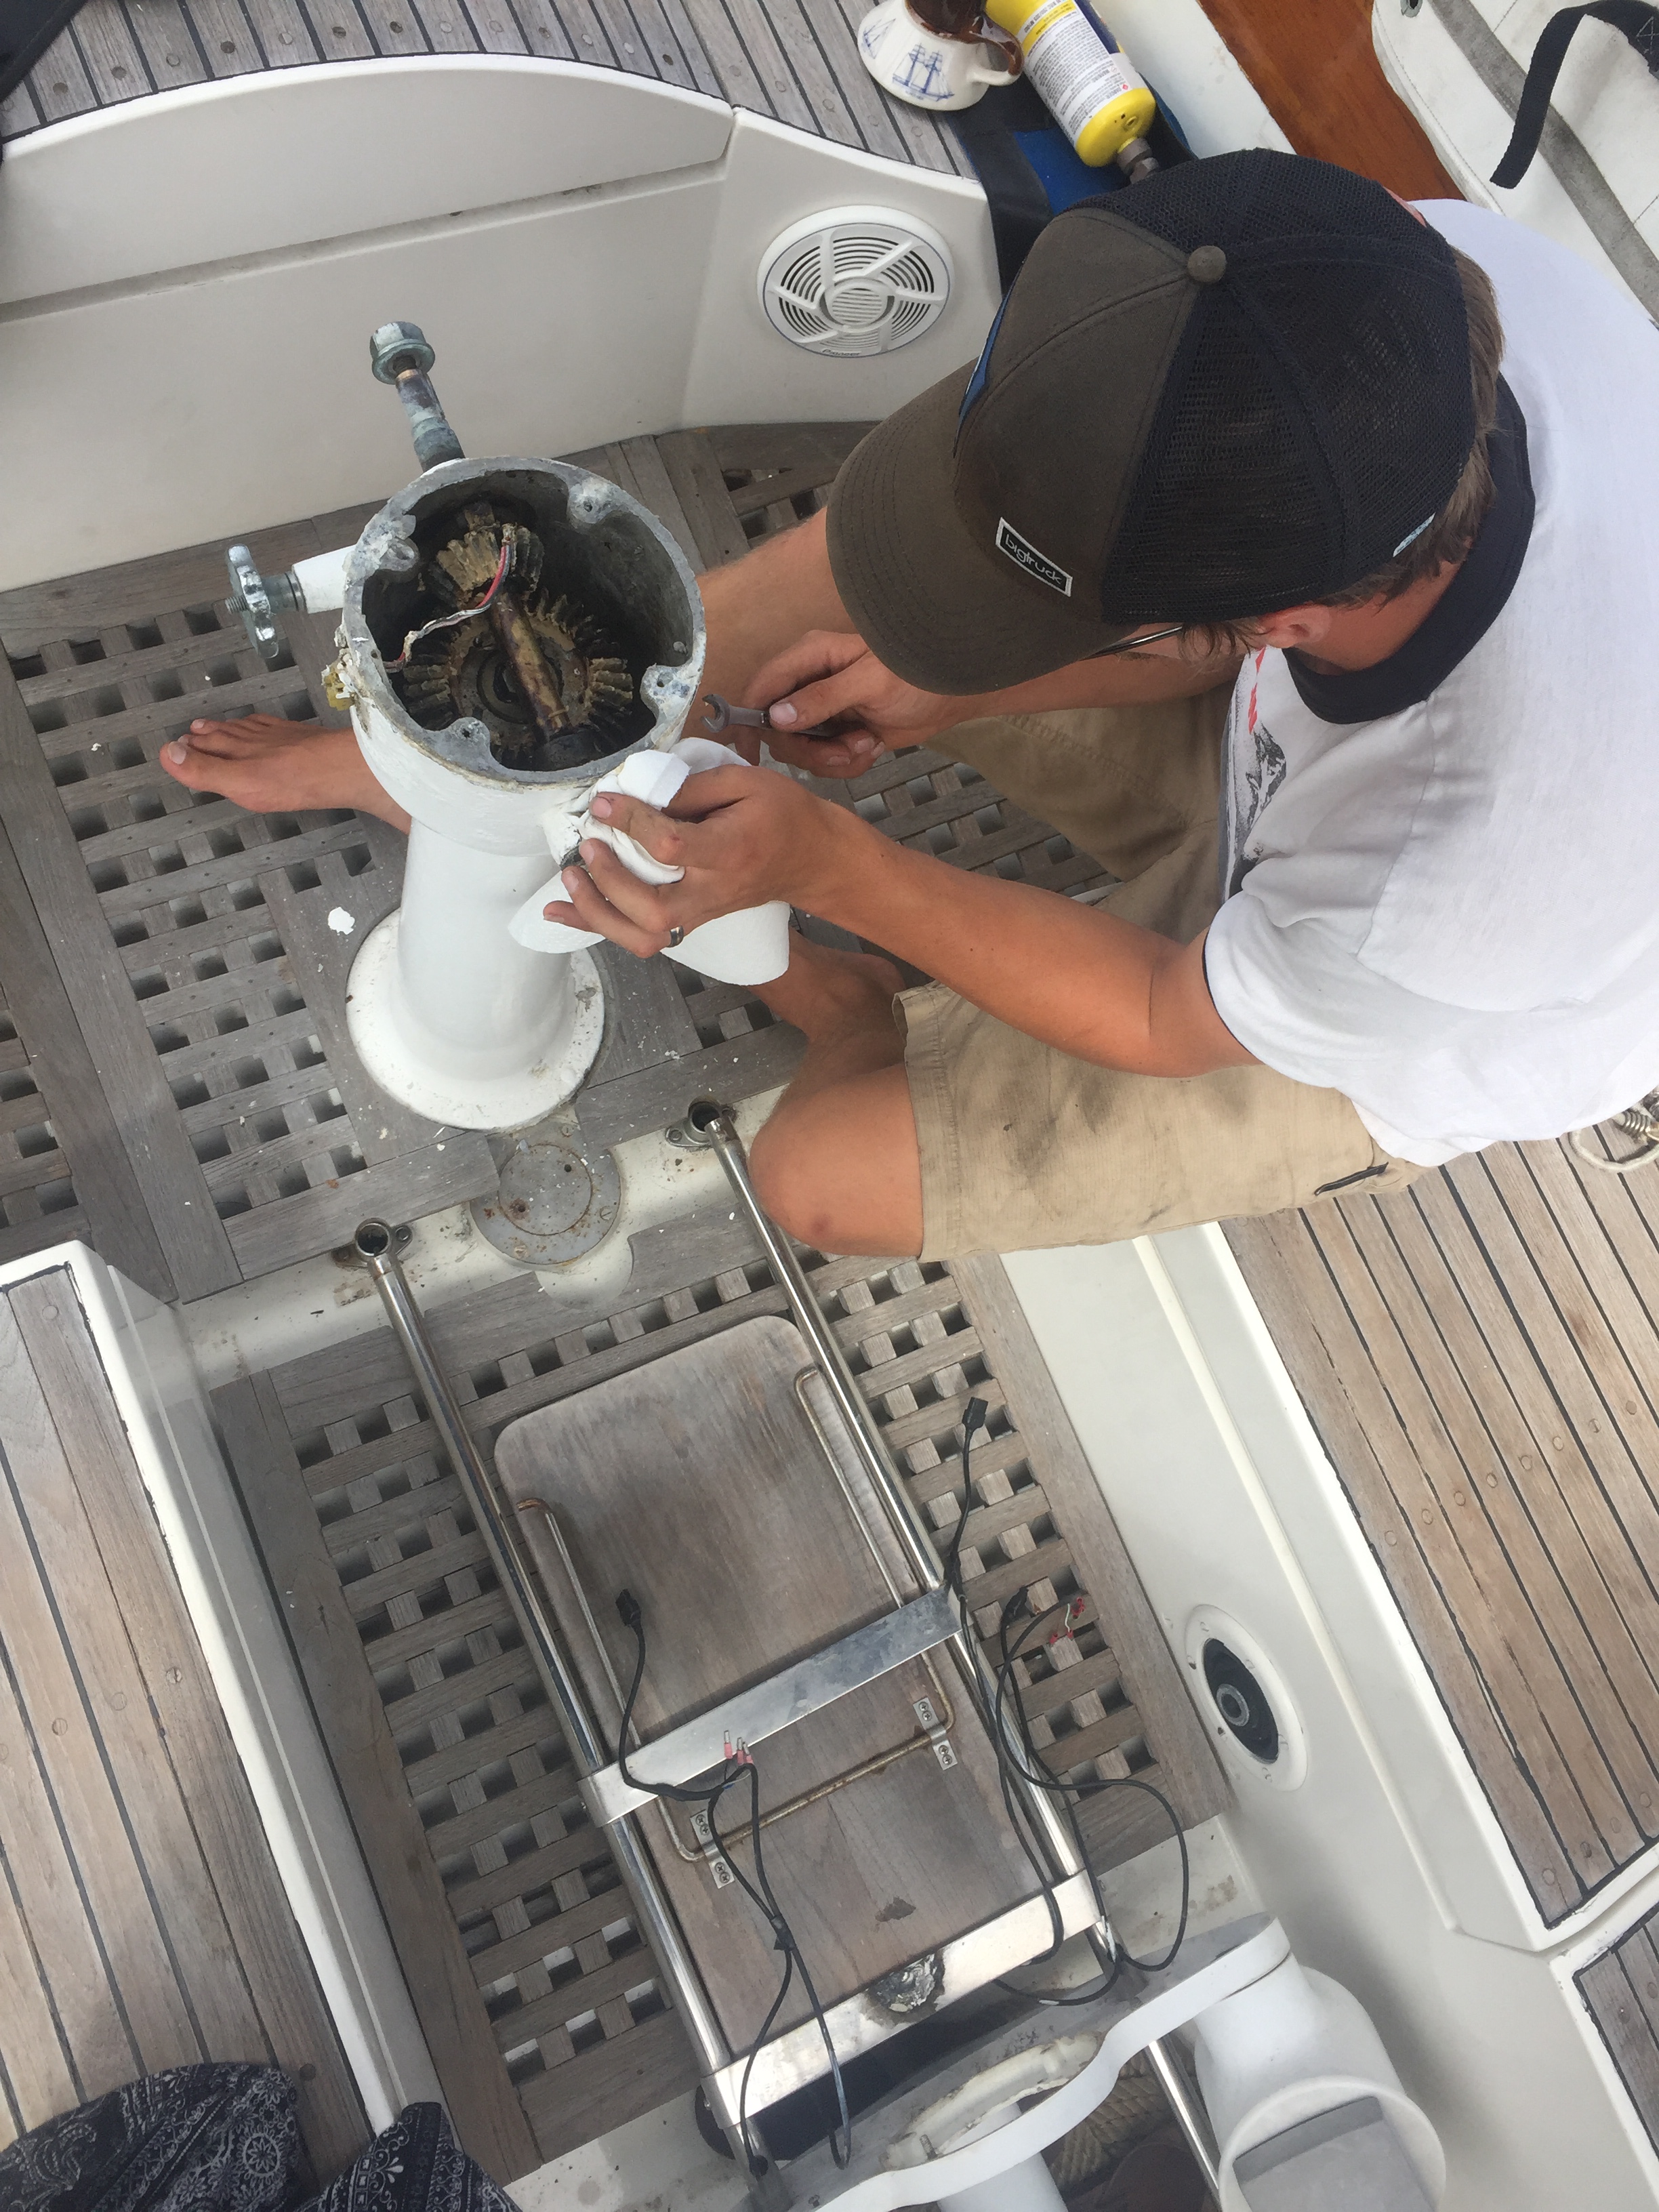
To kick this thing off, I thought I would write about my latest feat: servicing our pedestal. The pedestal is the home to your steering wheel, which translates your steering motions to the rudder; this is comparable to the power steering box in a car. Now, what you may or may not know is if the pedestal fails you have no way of steering your boat (besides an emergency tiller)- which as you can imagine, is a much bigger problem.
Before our first big overnight sail thats coming up, I wanted to make sure everything on Avocet was mechanically sound and wanted our steering lock to be functional for anchoring or heaving to, so I started with the pedestal. The first thing I noticed was that all of the grease zerks had been painted over… and the paint was failing sooo I estimated that the pedestal hadn’t been inspected/greased in about 5 to 10 years. What I am doing is preventative maintenance: a key thing for boat owners to know and do… fix things before they break.

I started by removing the compass and the top half of the pedestal where I discovered that whoever did this last only used 1/4 of the screws- only ONE screw was fastening the pedestal top because the other 3 were broken off… so I fixed that by drilling them out and tapping new threads for the machine screws. I have never had “geared steering” before, so instead of seeing a sprocket with chain coming up it was a big spider and planetary gear meshing together, kind of like a differential in a car.

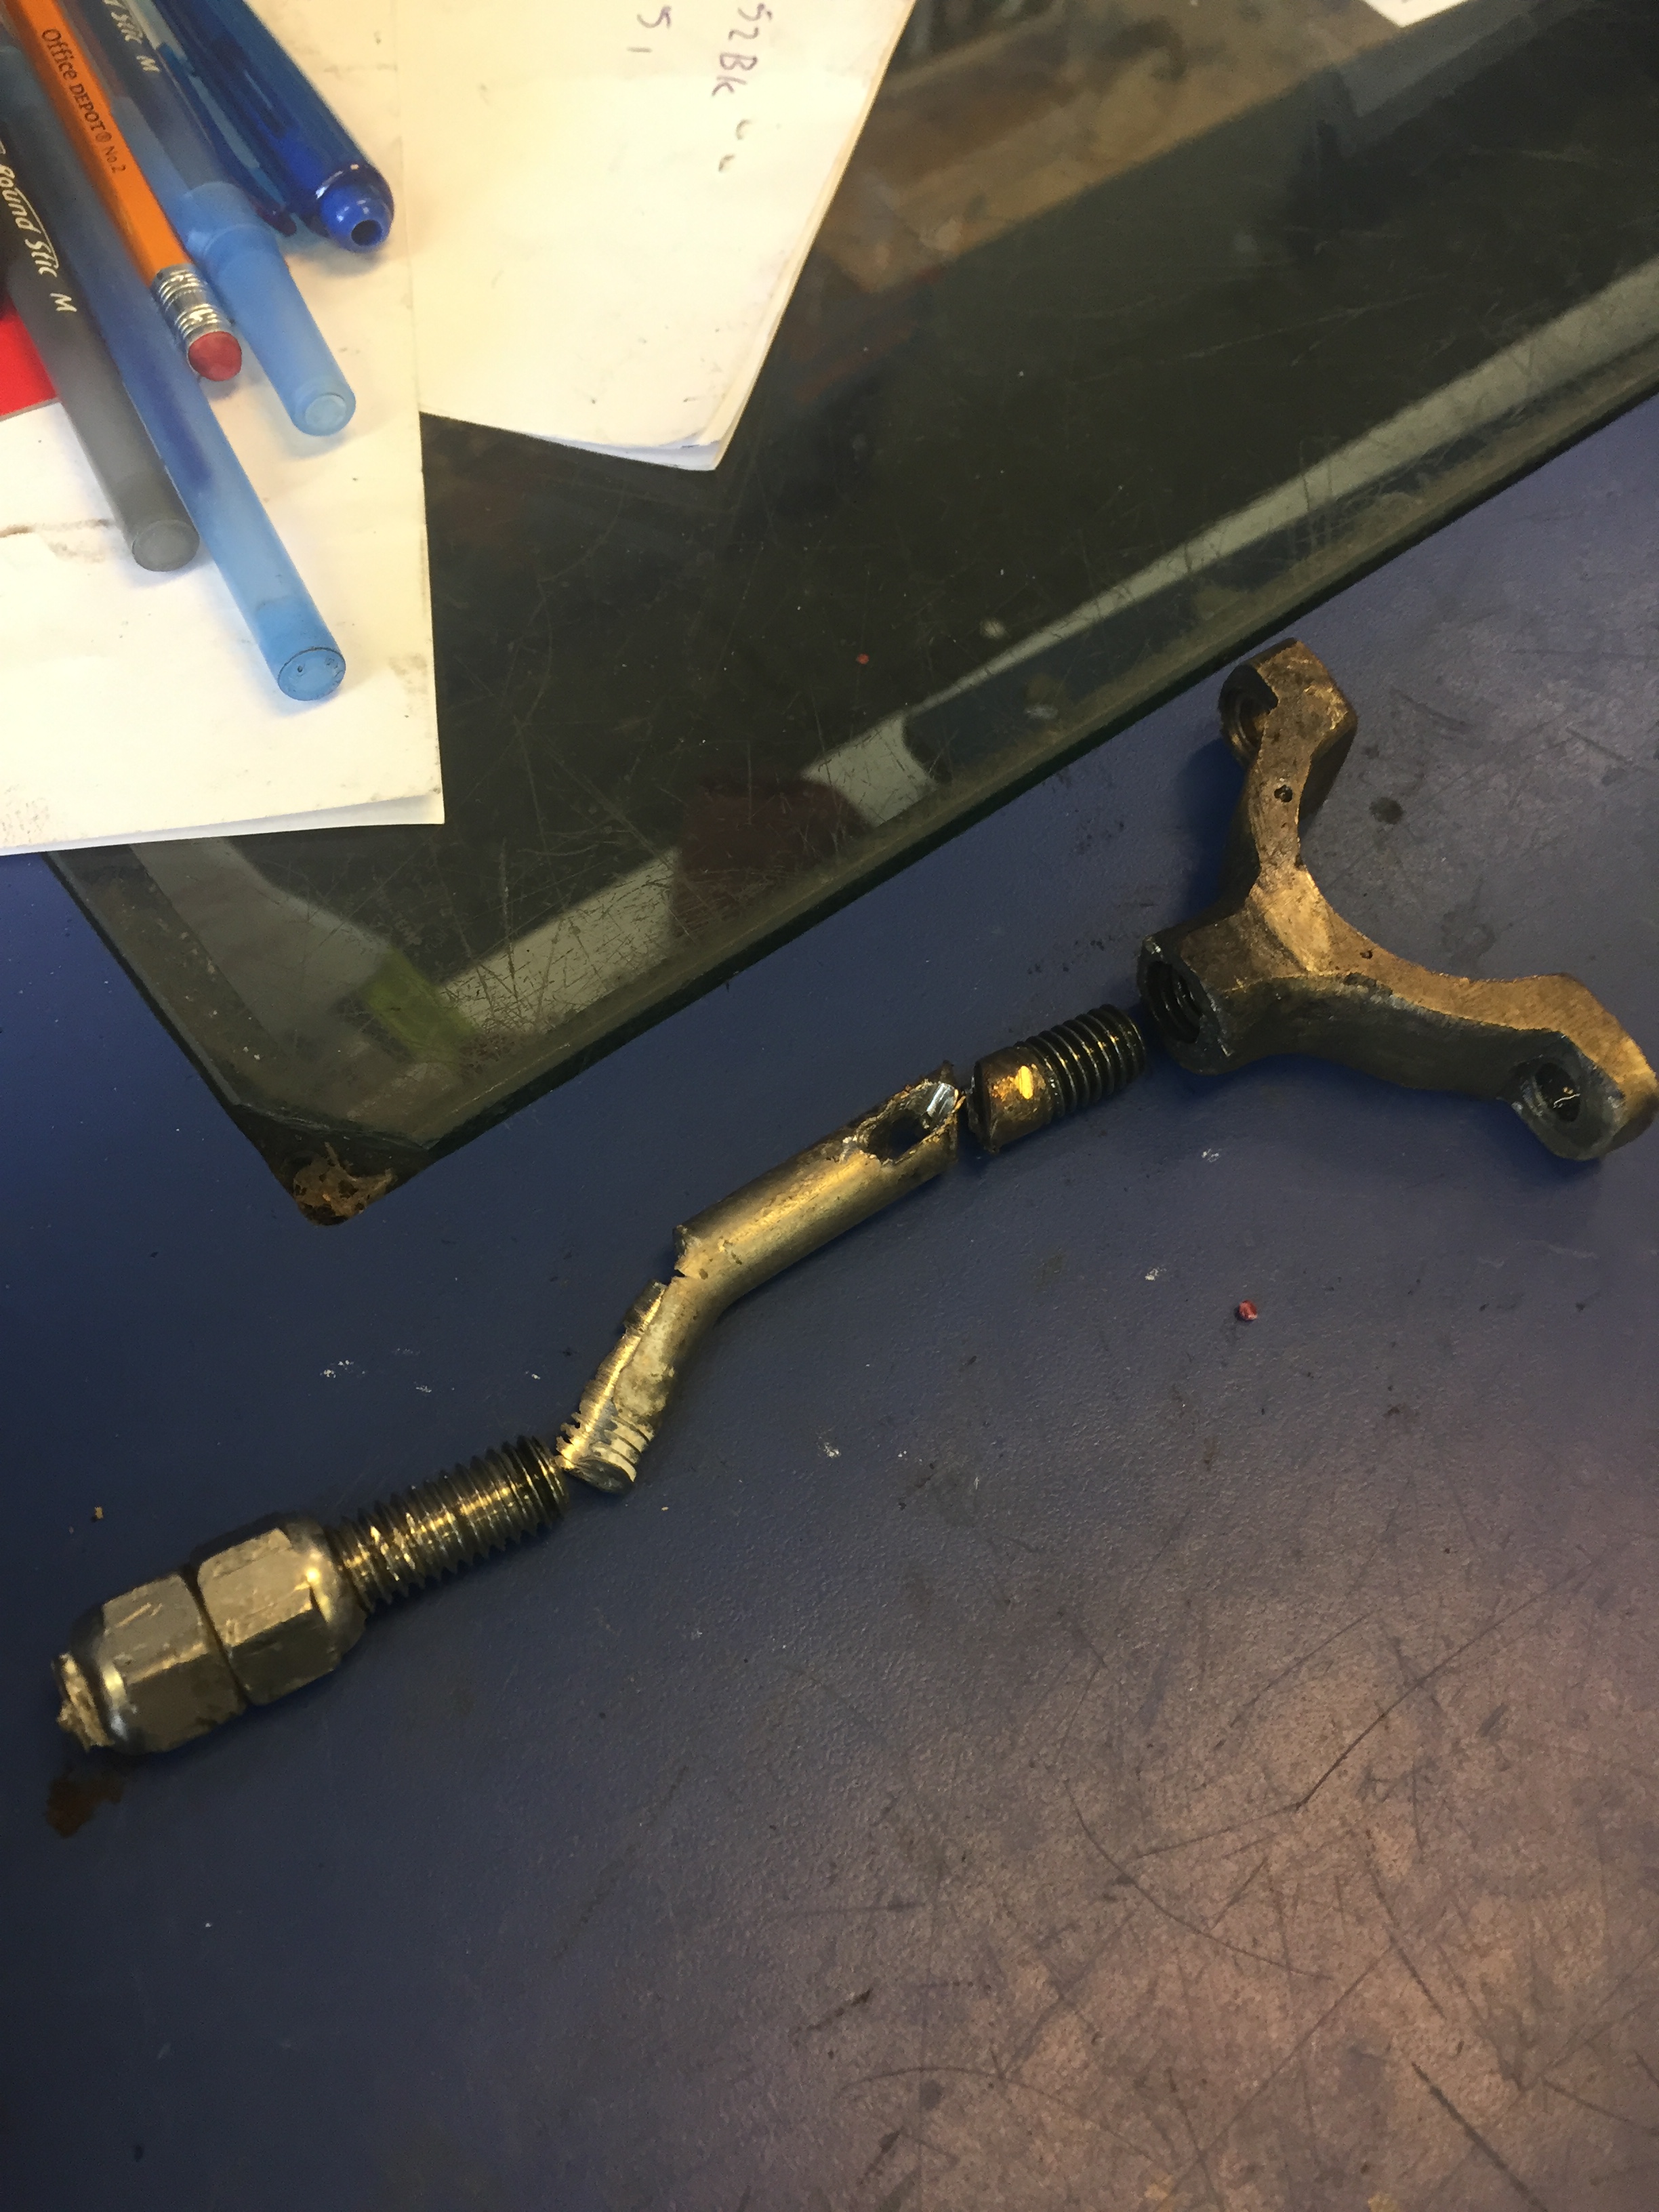
Here is the bolt that consumed 3 hours of my day and sanity.
All of the gears were being held in with set screws and one of these screws was behind the locking hub that was frozen to begin with. To fix that, I put two nuts on the end of the available thread and tried to back out the bolt from the bronze piece. Of course after getting a few turns on it the thing decides to break off flush with the aluminum housing, so the next step for me was to cut off the inside of this bolt so I could free up all the gears inside and get some room to tap the bolt through the housing. With just enough room to get my angle grinder with a cutting wheel I was able to cut it off, no problem. After taking all of the gears and steering shaft out, I had some room to bang the bolt through. After much persuasion with some intense heat using map gas I was making progress but then it seemed to get stuck about halfway out. I stopped banging on it with my 5 lbs hammer after I sheered a punch in half… so that was new. My only option was to drill it out because I couldn’t hit it from the other side. After drilling out a good amount it collapsed just enough inside the aluminum shaft to wiggle out. Its amazing how one bolt can take the better half of your afternoon to get out.
Other than that unanticipated bolt adventure, everything looked good. Nothing was broken or rusting (luckily its all yummy bronze parts) so all I did was clean all the old grease, polish up the shaft, relube everything with marine grease, and put in a new bolt lock then boom! all done!
Since there was some serious corrosion going on due to the paint failing, I used tef-gel to protect our pedestal from dissimilar metal corrosion. Fun fact: Anytime you paint over aluminum, you are taking away the oxygen which in turn takes away aluminum’s natural anticorrosion properties. Aluminum by itself will oxidize, but not corrode to the extent of when you paint over it. That is why we didn’t paint our windlass and why most aluminum boats remain unpainted. Eventually, I will have our whole pedestal sandblasted and leave it bare.
That is all my friends! Our pedestal is now back together and I have full faith in its structural integrity. Yes,a good reason to do these projects is to maintain them but it also gives me a piece of mind when I know exactly what condition it is in. When you are doing this project yourself, here are some key things you should keep in mind when servicing your pedestal:
- Look for water damage
- On cable steering, make sure all the cables are properly tensioned
- Look for extensive rust and corrosion
- On geared steering or worm, make sure everything is greased properly
Cheers!
~ Skipper Chris


0 Comments